Learning Objectives
- Install Arduino IDE
- Install required libraries
- Upload and run GPS code
- Understand NMEA sentences
Step 1: Choose Your Arduino Environment
You have two options for programming your Arduino. Choose whichever works best for you:
💻 Option A: Desktop IDE
Download and install the Arduino IDE on your computer.
- Go to arduino.cc/en/software
- Download Arduino IDE for your OS
- Install and launch the application
✅ Best for: Offline work, faster performance
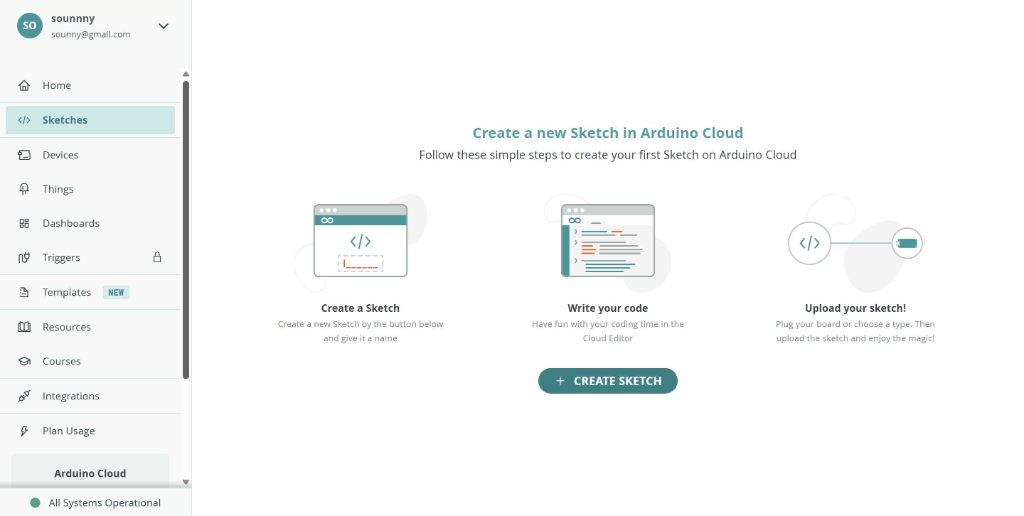
☁️ Option B: Arduino Cloud
Use Arduino directly in your web browser - no installation needed!
- Go to app.arduino.cc/sketches
- Create a free Arduino account (or sign in)
- Start coding in your browser!
✅ Best for: Quick setup, any computer
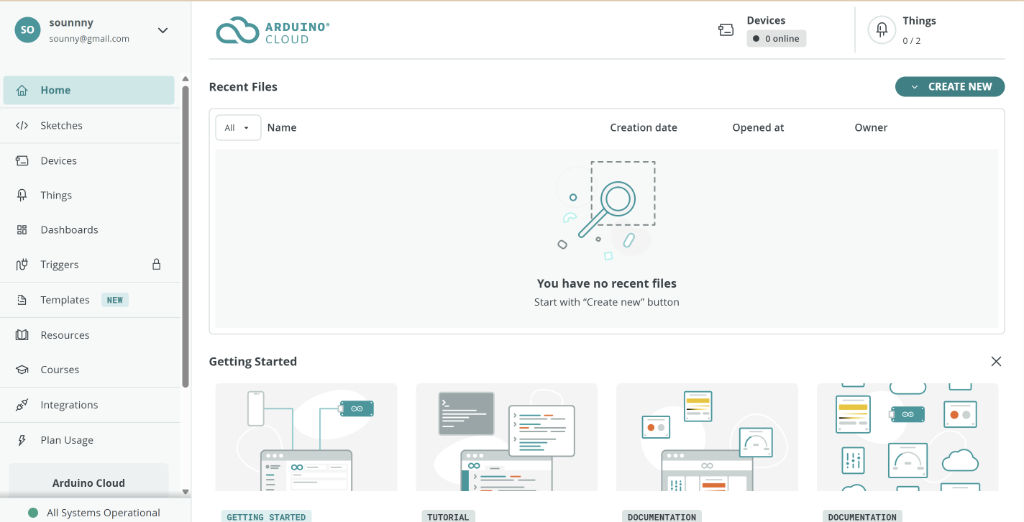
The Arduino Cloud interface - click "Create New" to start a new sketch.
Note: Both options work great for this workshop. If you're unsure, try the Arduino Cloud - it's the fastest way to get started!
☁️ For Arduino Cloud Users: Connect Your Device
If you're using Arduino Cloud, you need to connect your Arduino board:
- Plug your Arduino into your computer via USB
- Click on "Devices" in the left sidebar
- Follow the prompts to add your device
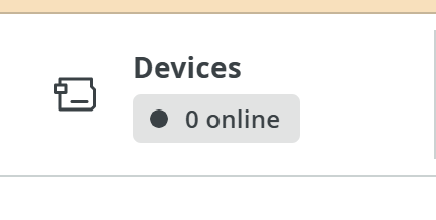
Click "Devices" to connect your Arduino
The wizard will guide you through three simple steps:
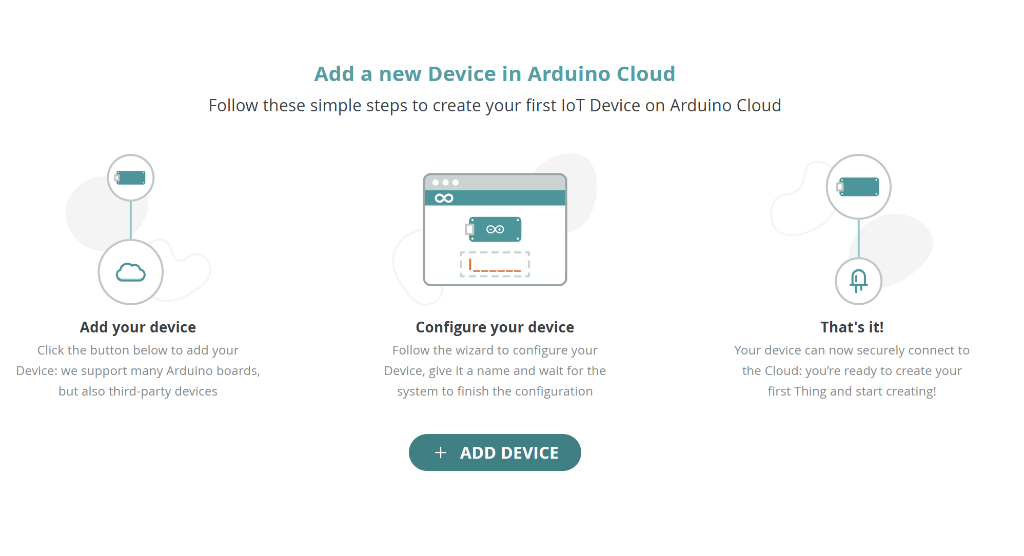
The device setup wizard - click "Add Device" and follow the prompts!
When prompted, choose "Automatic Setup" and select "Arduino boards":
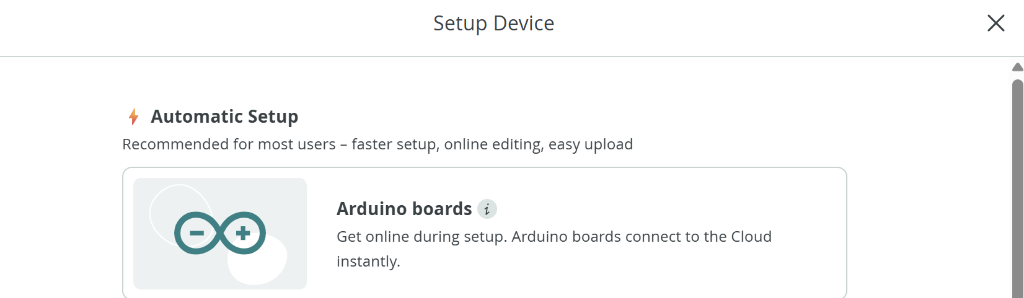
Select "Automatic Setup" → "Arduino boards" for the easiest configuration.
Then select "Via Serial (USB)" to connect your board:
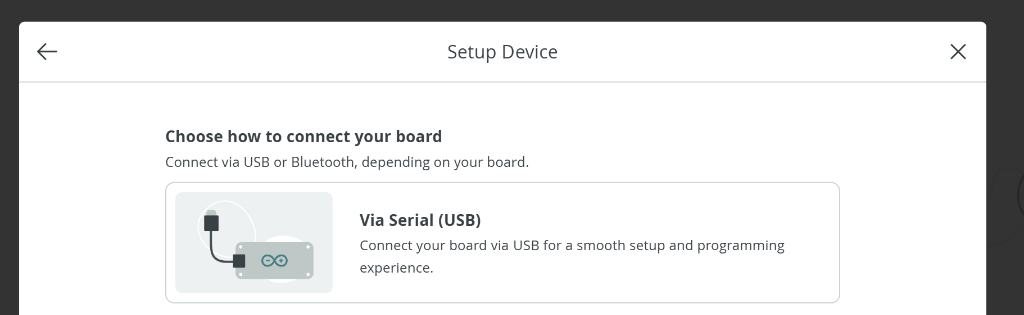
Choose "Via Serial (USB)" for the standard USB cable connection.
⚠️ Arduino Cloud Agent Required: If you see this prompt, click "Install" to download the Arduino Cloud Agent. This small program allows your browser to communicate with the Arduino.
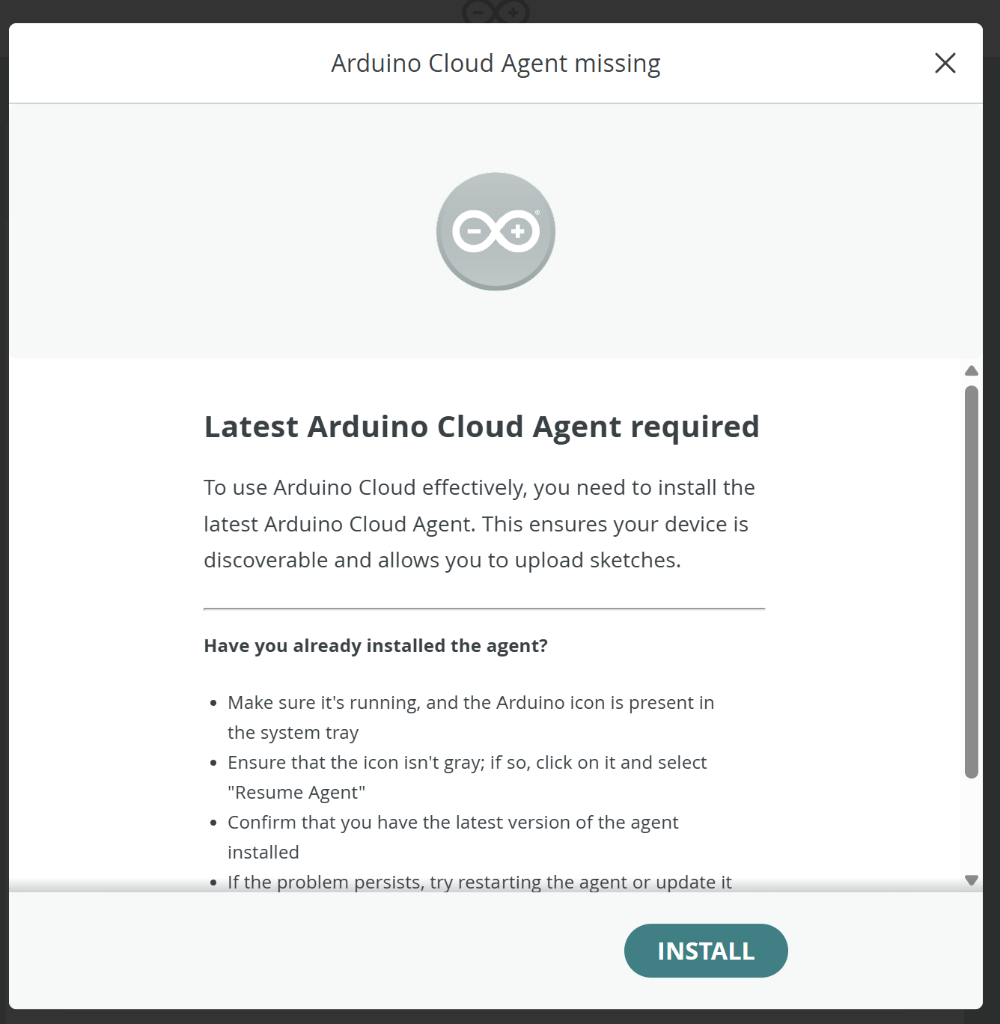
Click "Install" if you see this prompt - it's a one-time setup!
Follow the installation wizard - accept the defaults and click Next through the steps:
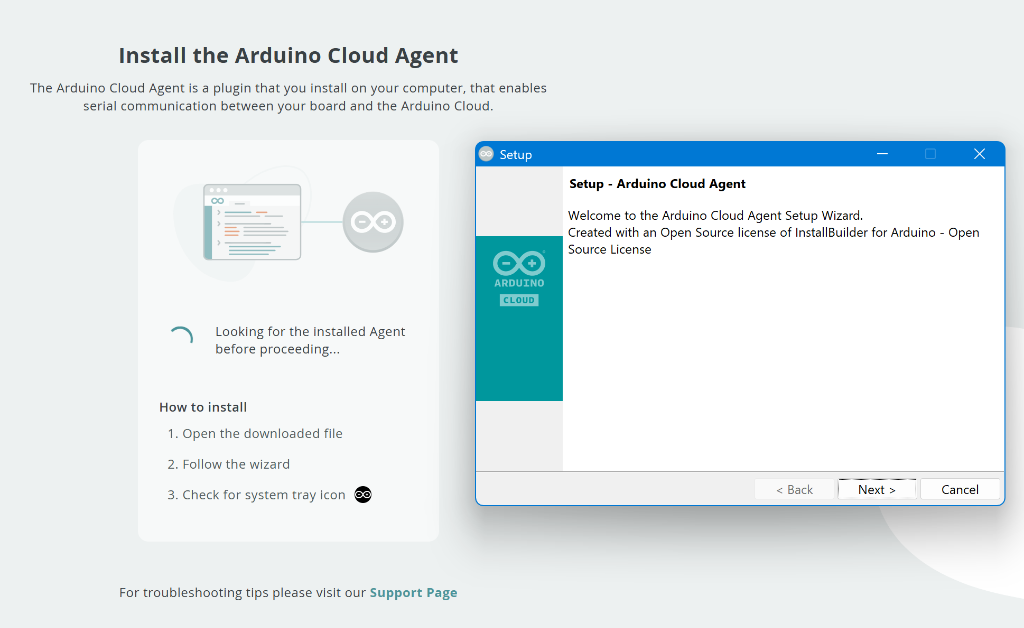
Open the downloaded file and follow the wizard.
Click Finish when complete. You should see "Your Agent is ready":
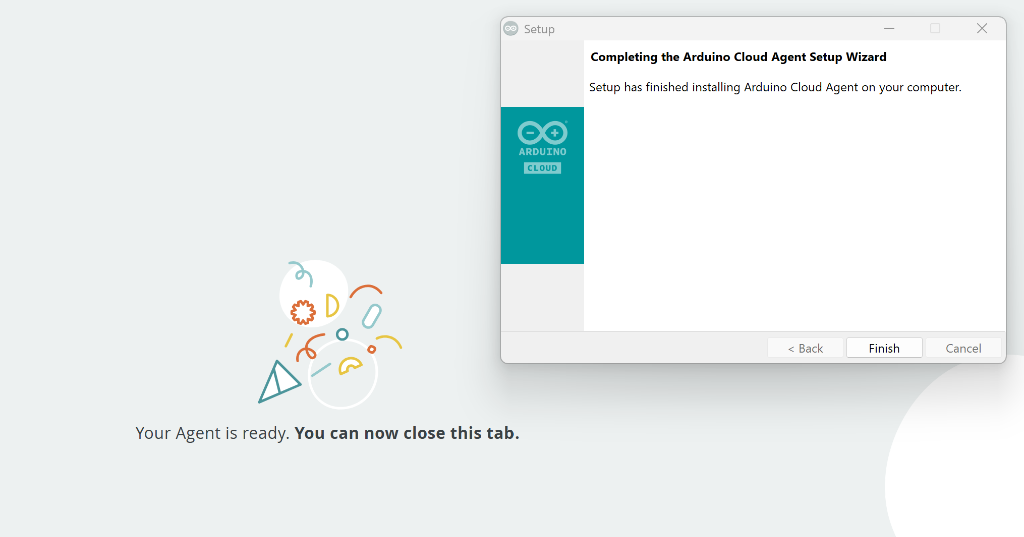
Click "Finish" and you're all set!
Once installed, the Cloud platform will detect your board automatically. Select it from the list:
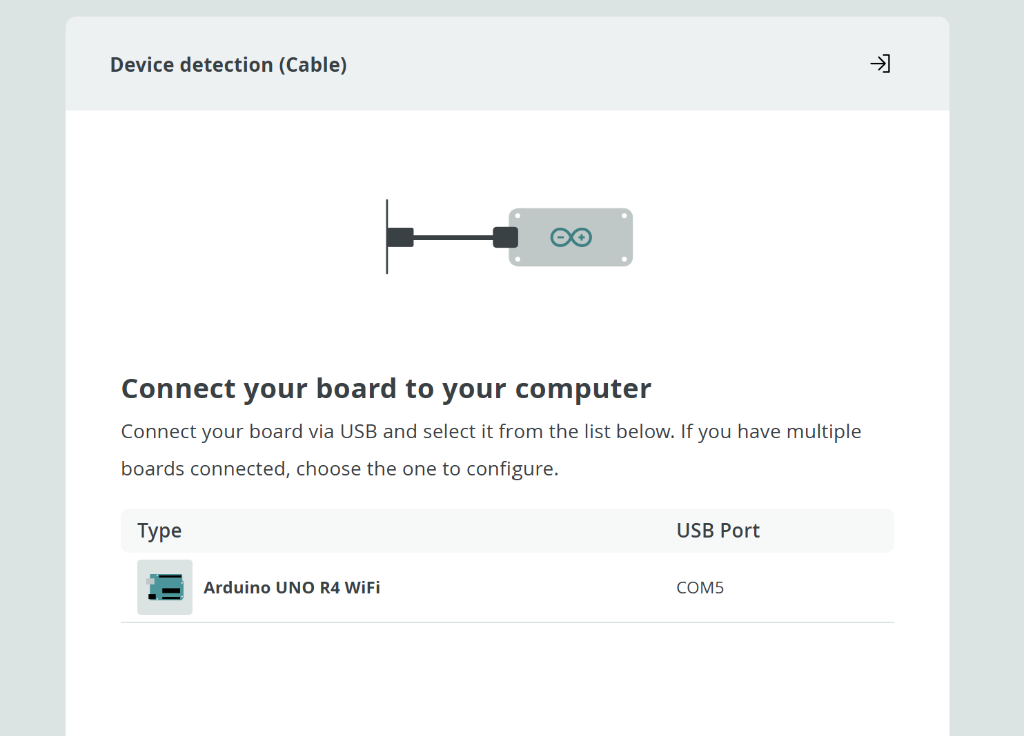
Your Arduino UNO R4 WiFi should appear in the list - click to select it!
Wait while the device pairs (this may take up to 30 seconds):
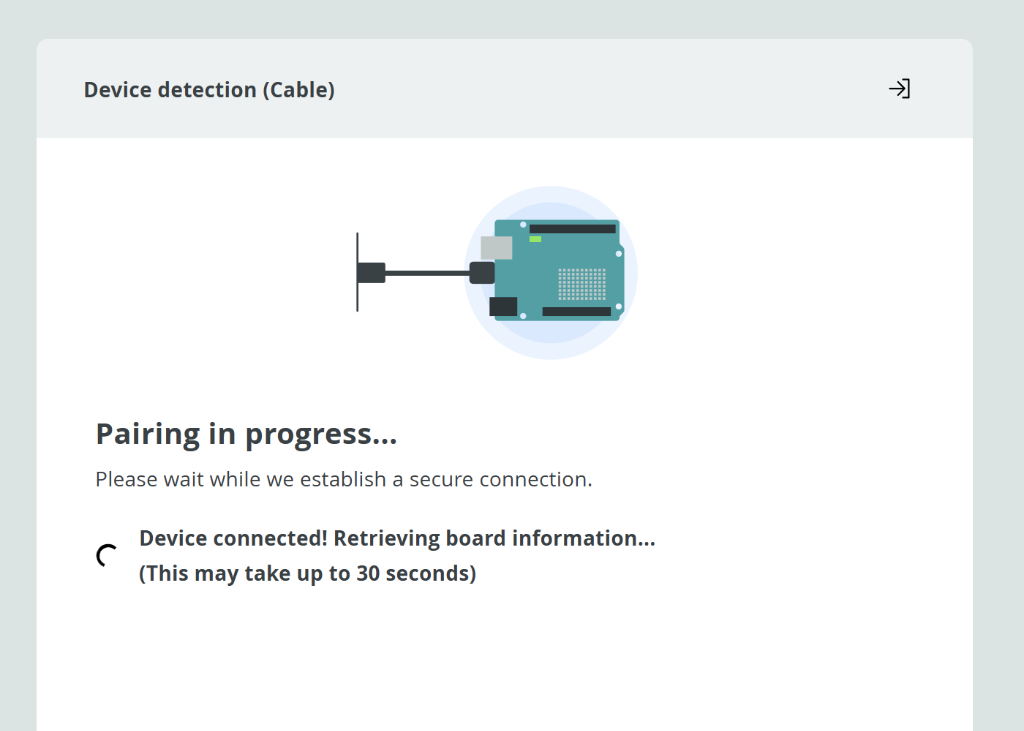
Pairing in progress - please wait...
You should see confirmation that your device is connected. Click Continue:
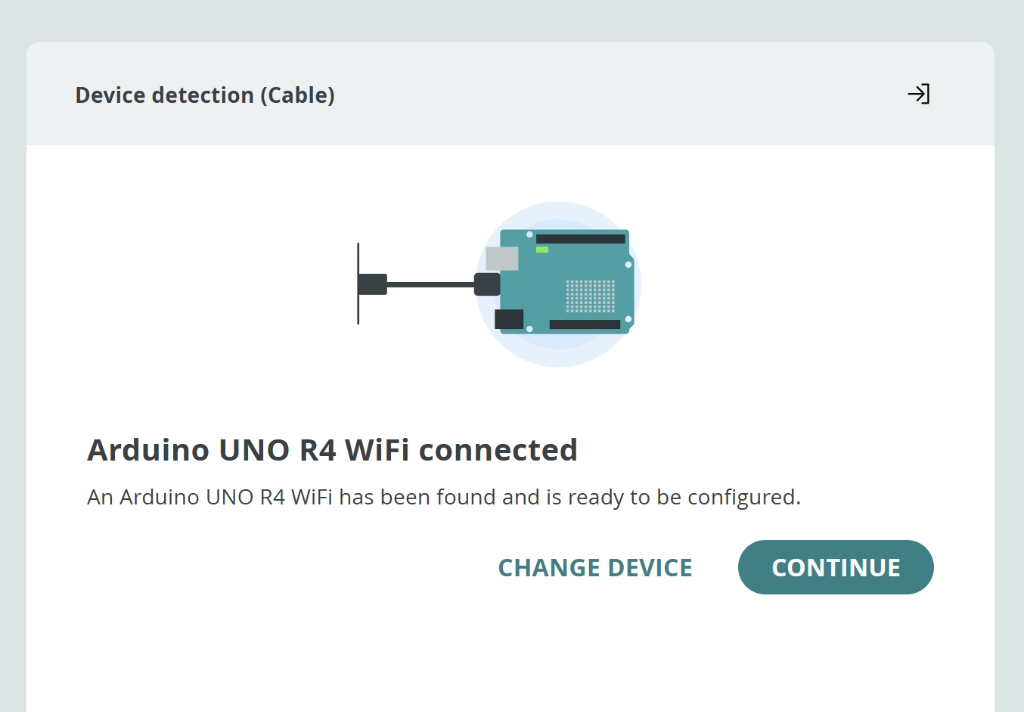
"Arduino UNO R4 WiFi connected" - Click Continue to finish setup!
If prompted, allow the board to update. This takes a few minutes - keep the device connected:
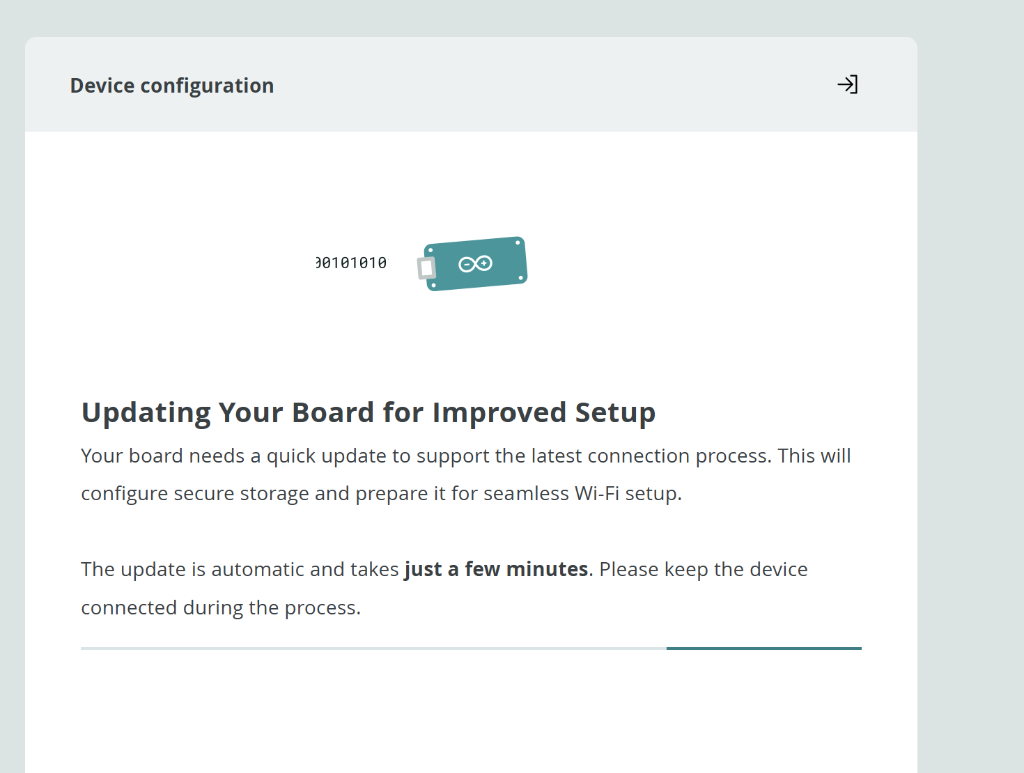
The update is automatic - just wait for it to complete.
If asked, unplug and replug the board to finalize the firmware update:
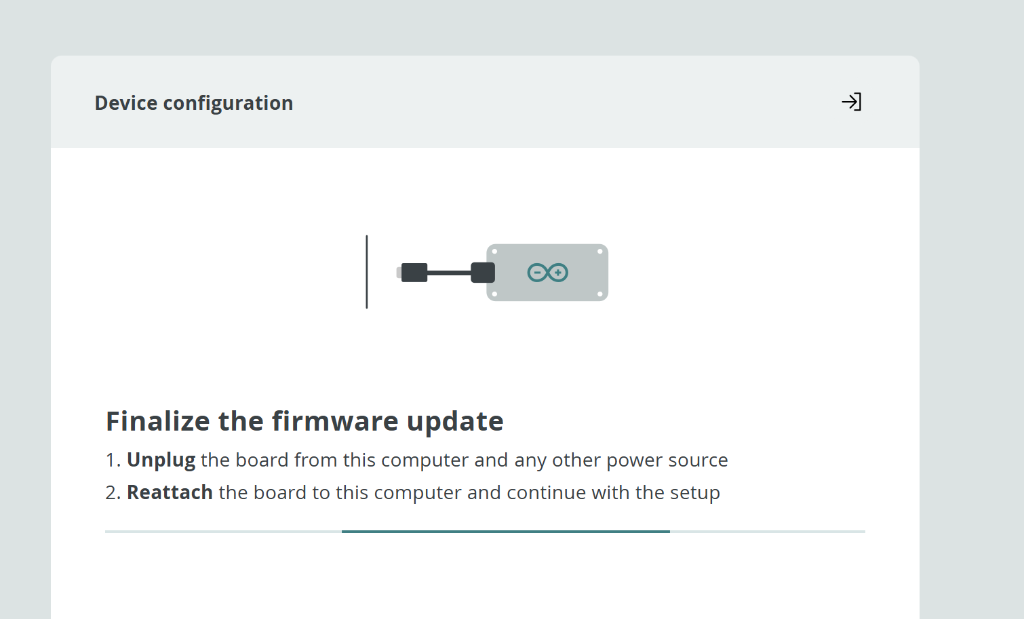
Unplug the USB cable, wait a moment, then plug it back in.
You should see the success confirmation. Make sure your device LED is solid (not blinking):
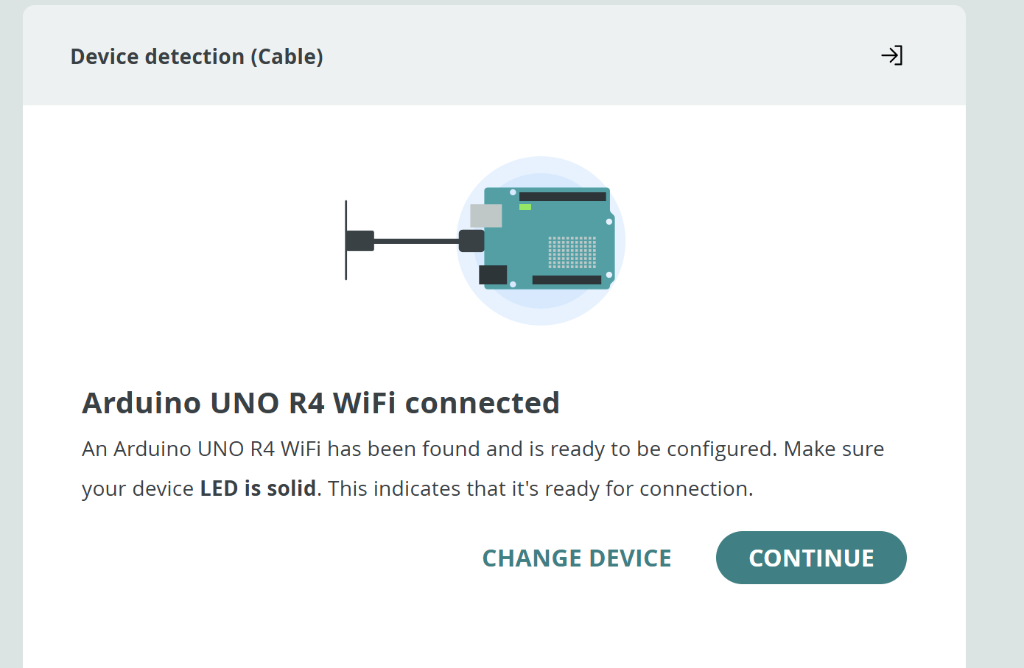
"Arduino UNO R4 WiFi connected" with solid LED = ready to go! Click Continue.
Finally, configure the device by giving it a name (e.g., "GPS Unit"). Click the checkmark when done:
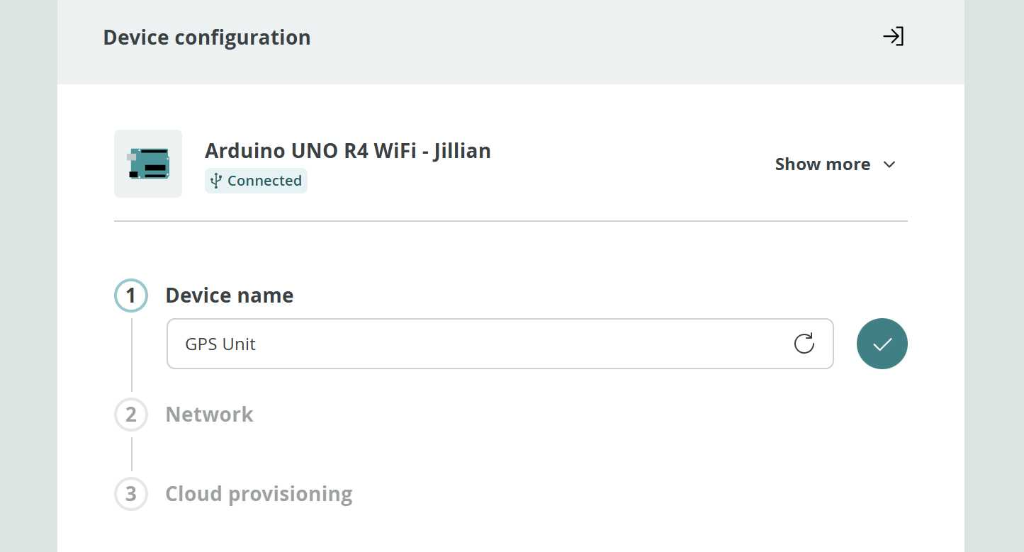
Name your device (e.g., "GPS Unit") and click the checkmark.
✅ Setup Complete! Your board is now paired with Arduino Cloud. The solid LED confirms a successful connection. You're ready to start coding!
Step 2: Install the TinyGPS++ Library
We need the TinyGPS++ library to parse GPS data. Choose the method that matches your environment:
💻 For Desktop Arduino IDE:
- Open Arduino IDE
- Go to Sketch → Include Library → Manage Libraries
- Search for "TinyGPSPlus" by Mikal Hart
- Click Install
☁️ For Arduino Cloud:
- Click the Libraries icon (📚) in the left sidebar
- Search for "TinyGPSPlus" or "TinyGPS++"
- Click Include to add it to your sketch
⚠️ Can't Find the Library? If searching doesn't work, you can manually import it:
- Go to github.com/sounny/TinyGPSPlus
- Click Code → Download ZIP
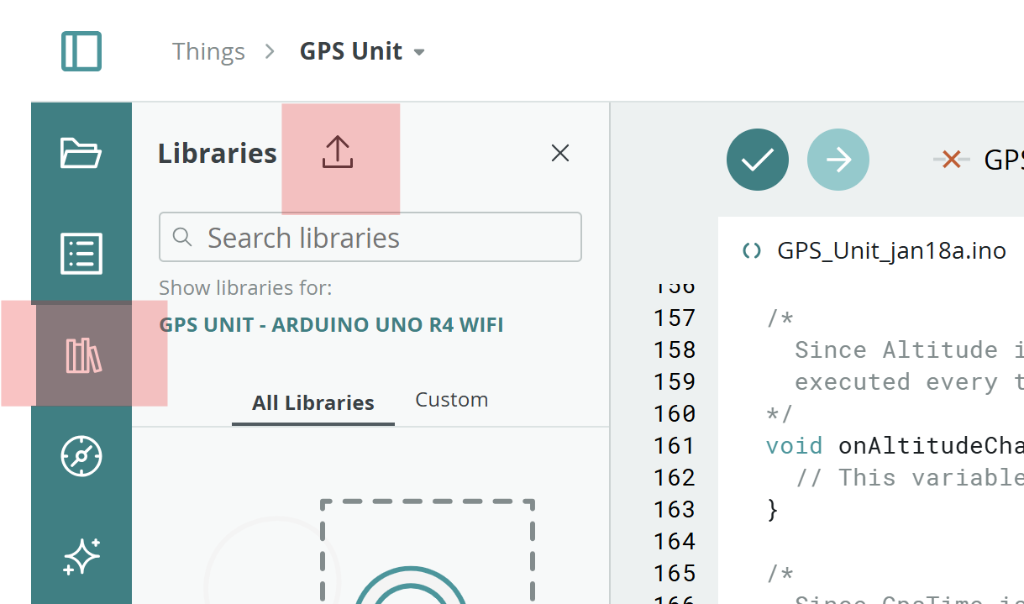
- In Arduino Cloud: Click Libraries (book icon) then the Import icon (see image below)
- Upload the ZIP file you downloaded
- Refresh your browser to load the library

Note for Uno R4 WiFi: You do NOT need the "SoftwareSerial" library. The Uno R4 WiFi has a dedicated hardware serial port (Serial1) on Pins 0 and 1 that works much better!
Step 3: The GPS Code
💻 For Desktop IDE (Serial Monitor Test): Copy and paste this code to test your GPS and see output in the Serial Monitor:
👨💻 Code Challenge: This is "boilerplate" starter code. You might need to troubleshoot it to get it working perfectly with your specific module!
Up for a challenge? Try modifying the code to:
- Print the Altitude (Z value) alongside Lat/Long.
- Print the Raw NMEA sentences to see exactly what the satellite is saying.
/*
 * GPS Workshop - ISU MSS26
 * Building and Testing GPS Units
 *
 * This code reads GPS data from a NEO-6M module
 * using the Hardware Serial port (Serial1) on the Arduino Uno R4 WiFi
 *
 * Wiring:
 *   GPS TX  -> Arduino Pin 0 (RX)
 *   GPS RX  -> Arduino Pin 1 (TX)
 *   GPS VCC -> Arduino 5V
 *   GPS GND -> Arduino GND
 */

#include <TinyGPS++.h>

// The TinyGPS++ object
TinyGPSPlus gps;

void setup() {
  // Start the Serial Monitor (laptop)
  Serial.begin(9600);

  // Start the hardware serial port for the GPS (Pins 0 and 1)
  // Most NEO-6M modules use 9600 baud by default
  Serial1.begin(9600);

  Serial.println(F("===================================="));
  Serial.println(F("  GPS Workshop - ISU MSS26"));
  Serial.println(F("  Hardware: Arduino Uno R4 WiFi"));
  Serial.println(F("===================================="));
  Serial.println();
  Serial.println(F("Searching for satellites..."));
}

void loop() {
  // Read data from the GPS module on Serial1
  while (Serial1.available() > 0) {
    if (gps.encode(Serial1.read())) {
      displayInfo();
    }
  }

  // Check if GPS is detected (if 5 seconds pass with no data)
  if (millis() > 5000 && gps.charsProcessed() < 10) {
    Serial.println(F("ERROR: No GPS detected. Check wiring (Pins 0 & 1)!"));
    delay(5000);
  }
}

// =========================================================
// 🛠️ DIAGNOSTIC TOOL: Console Output
// The code below reports status to the user. Use this for troubleshooting!
// =========================================================
void displayInfo() {
  Serial.println(F("----------------------------------------"));

  // Location
  Serial.print(F("Location:  "));
  if (gps.location.isValid()) {
    Serial.print(gps.location.lat(), 6);
    Serial.print(F(", "));
    Serial.print(gps.location.lng(), 6);
  } else {
    Serial.print(F("INVALID (Searching for satellites...)"));
  }
  Serial.println();

  // Date and Time
  Serial.print(F("Date/Time: "));
  if (gps.date.isValid() && gps.time.isValid()) {
    Serial.print(gps.date.month());
    Serial.print(F("/"));
    Serial.print(gps.date.day());
    Serial.print(F("/"));
    Serial.print(gps.date.year());
    Serial.print(F(" "));
    if (gps.time.hour() < 10) Serial.print(F("0"));
    Serial.print(gps.time.hour());
    Serial.print(F(":"));
    if (gps.time.minute() < 10) Serial.print(F("0"));
    Serial.print(gps.time.minute());
    Serial.print(F(" UTC"));
  } else {
    Serial.print(F("INVALID"));
  }
  Serial.println();

  // Satellites & Quality
  Serial.print(F("Satellites: "));
  Serial.print(gps.satellites.value());
  Serial.print(F("  |  HDOP: "));
  Serial.println(gps.hdop.hdop());

  Serial.println(F("----------------------------------------"));
  Serial.println();
}
🛠️ Troubleshooting Tool: Pay special attention to the displayInfo() function regarding the Console Output. This is your "dashboard" for troubleshooting. If the GPS isn't working, this code is what tells you why!
☁️ For Arduino Cloud (IoT Dashboard):
If you're using Arduino Cloud, first create a "Thing" with these variables:
- latitude - Floating Point Number (Read Only)
- longitude - Floating Point Number (Read Only)
- altitude - Floating Point Number (Read Only)
- satellites - Integer (Read Only)
- gps_time - Character String (Read Only)
Then use this code in your Cloud sketch:
/*
  GPS Workshop - Arduino IoT Cloud Version
  Config: Hardware Serial1 on Pins 0 & 1
*/

#include "thingProperties.h"
#include <TinyGPS++.h>

// The TinyGPS++ object
TinyGPSPlus gps;

// Timer for GPS updates (don't flood the cloud)
unsigned long lastUpdate = 0;
const unsigned long UPDATE_INTERVAL = 2000; // Update every 2 seconds

void setup() {
  // Initialize serial for monitor
  Serial.begin(9600);
  delay(1500);

  // Start the Hardware Serial port for the GPS (Pins 0 and 1)
  Serial1.begin(9600);

  Serial.println(F("===================================="));
  Serial.println(F("  GPS Workshop - IoT Cloud Version"));
  Serial.println(F("  Config: Pins 0 & 1 (Hardware Serial)"));
  Serial.println(F("===================================="));
  Serial.println();

  // Defined in thingProperties.h
  initProperties();
  ArduinoCloud.begin(ArduinoIoTPreferredConnection);
  setDebugMessageLevel(2);
  ArduinoCloud.printDebugInfo();

  Serial.println(F("Searching for GPS satellites..."));
}

void loop() {
  ArduinoCloud.update();

  // Read data from the GPS module on Serial1
  while (Serial1.available() > 0) {
    char c = Serial1.read();
    if (gps.encode(c)) {
      // Only update cloud every 2 seconds
      if (millis() - lastUpdate >= UPDATE_INTERVAL) {
        updateGPSData();
        lastUpdate = millis();
      }
    }
  }

  // DIAGNOSTIC LOOP - Check for errors every 5 seconds
  if (millis() > 5000 && millis() - lastUpdate > 5000) {
    if (gps.charsProcessed() < 10) {
      Serial.println(F("ERROR: No GPS data received! Check wiring."));
      Serial.println(F("       GPS TX -> Arduino Pin 0"));
      Serial.println(F("       GPS RX -> Arduino Pin 1"));
    } else if (gps.sentencesWithFix() == 0) {
      Serial.print(F("DIAGNOSTIC: connected ("));
      Serial.print(gps.charsProcessed());
      Serial.println(F(" bytes). Waiting for fix... (Go outside!)"));
    }
    lastUpdate = millis();
  }
}

void updateGPSData() {
  if (gps.location.isValid()) {
    latitude = gps.location.lat();
    longitude = gps.location.lng();
    altitude = gps.altitude.meters();
    satellites = gps.satellites.value();

    char timeBuffer[10];
    sprintf(timeBuffer, "%02d:%02d:%02d",
            gps.time.hour(), gps.time.minute(), gps.time.second());
    gps_time = String(timeBuffer);
  }
}
Step 4: Upload the Code
💻 For Desktop Arduino IDE:
- Connect your Arduino to the computer via USB.
- Go to Tools → Board and select Arduino Uno R4 WiFi.
- Go to Tools → Port and select the COM port that appears.
- Click the Upload Button (the Right Arrow icon `→`) at the top left.
- Wait for the message "Done uploading" at the bottom.
☁️ For Arduino Cloud:
- Ensure the Arduino Create Agent is running on your computer.
- Check that your board (Arduino Uno R4 WiFi) is selected in the top bar.
- Click the Upload Button (the Right Arrow icon `→`) located near the top right.
- Wait for the console to say "Success" or "Uploaded".
- Click the Monitor tab to check for the "DIAGNOSTIC" messages!
Step 5: View Your Data
For Serial Monitor (Debugging):
- Open Tools → Serial Monitor (or the Monitor tab in Cloud).
- Set baud rate to 9600 (bottom right corner).
- Check Diagnostics: If it says "No GPS data received", check your wiring!
- If it says "Waiting for fix...", take the unit outside.
For Arduino Cloud Dashboard:
- Once the Monitor shows a fix, go to your Dashboards tab.
- Add a Map Widget and link it to `latitude` and `longitude`.
- Add Gauges for `satellites` and `altitude`.
- Watch your real-time position appear on the map! 🌍
Fix Time: The first time you power up a GPS, it can take 1-5 minutes to download the satellite almanac (cold start). Be patient and ensure it has a clear view of the sky!
Troubleshooting: "No GPS Data Received"
If your Serial Monitor shows a repeating error like the one below, your Arduino cannot "hear" the GPS module.
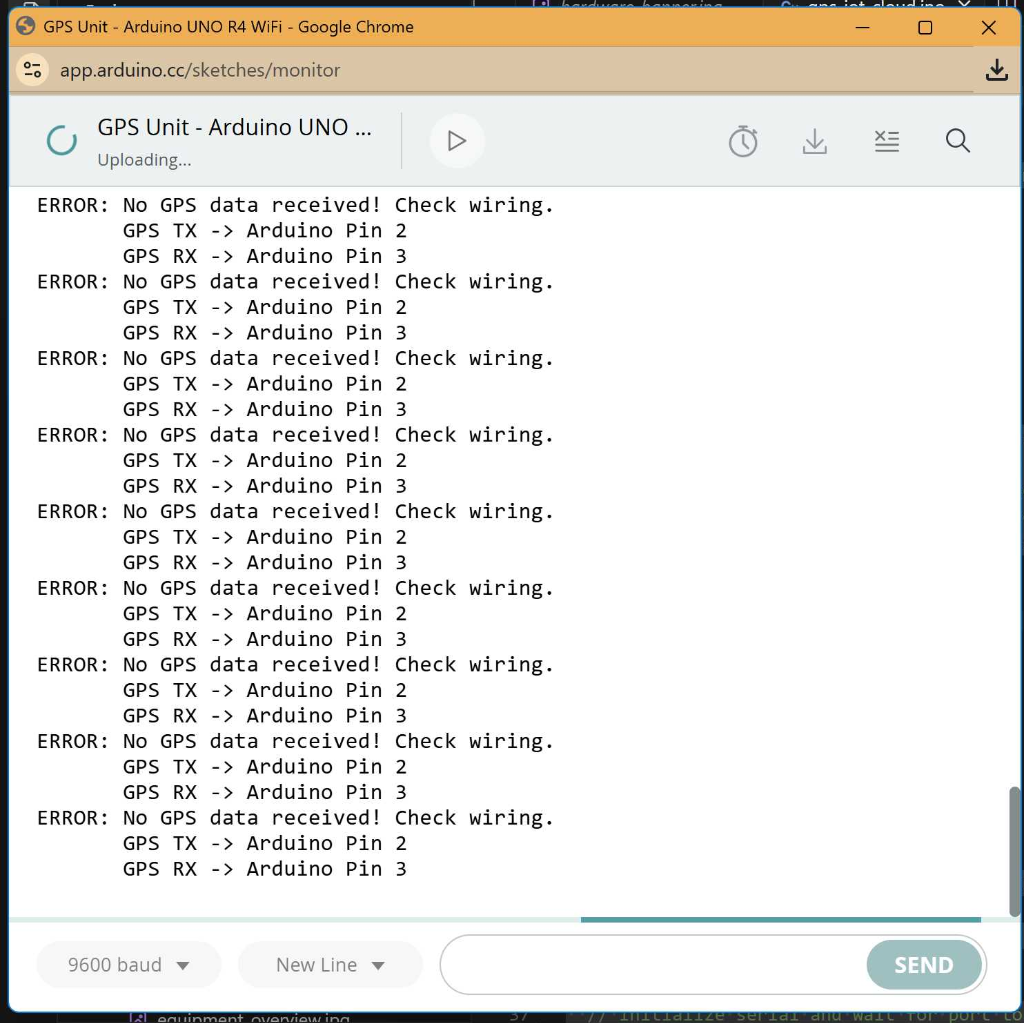
How to Fix It:
- Check Power (No Light?): Look at the GPS board. Is the small LED on? If not, check your VCC (5V) and GND wires. The GPS needs power!
- Swap TX/RX: This is the most common issue. Swap the wires on Pin 0 and Pin 1. (GPS TX must go to Arduino RX).
- Check Solder: If you are using a new module, ensure the headers are soldered on, not just loose.
Understanding NMEA Sentences
GPS modules output data in NMEA format. Common sentences:
| Sentence | Description |
|---|---|
| $GPGGA | Fix information: time, position, quality |
| $GPRMC | Recommended minimum: position, velocity, time |
| $GPGSV | Satellites in view |
| $GPGSA | DOP and active satellites |
| $GPVTG | Velocity and heading |
Example NMEA Sentence
$GPGGA,123519,4807.038,N,01131.000,E,1,08,0.9,545.4,M,47.0,M,,*47| Field | Value | Meaning |
|---|---|---|
| Time | 123519 | 12:35:19 UTC |
| Latitude | 4807.038,N | 48 deg 07.038' N |
| Longitude | 01131.000,E | 11 deg 31.000' E |
| Fix Quality | 1 | GPS fix |
| Satellites | 08 | 8 satellites in use |
| HDOP | 0.9 | Excellent geometry |
| Altitude | 545.4 M | 545.4 meters |
Troubleshooting
| Problem | Possible Cause | Solution |
|---|---|---|
| "No GPS detected" error | Wrong wiring | Check TX/RX connections |
| No satellite fix | Indoors | Go outside, clear sky view |
| Fix takes very long | Cold start | Wait 2-3 minutes, stay still |
| Random characters in Serial | Wrong baud rate | Check GPS=9600, Monitor=9600 |